
Linear Guide: Installation Guide & Basic Troubleshooting
▶Installation of Linear Guide |
▶Linear Guide Installation Reference Diagram |
▶Linear Guide Installation Precautions |
▶Linear Guide Basic Troubleshooting |
Installation of Linear Guide:
Linear guide installation is divided into the following two types:
1. Mounting the Master Linear Guide Rail:
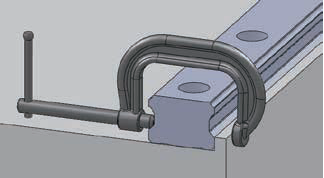
After temporarily tightening the mounting bolts, use a small device or the like to firmly press the rail to the side, against the reference section. Fully tighten the mounting bolts. Repeat this for each mounting bolt in sequence.
2. Mounting the Subsidiary Linear Guide Rail: To ensure parallelism of the subsidiary Linear Guide rail with the master Linear Guide rail properly mounted, the following methods are recommended.
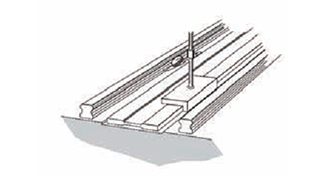
(1) Use a Straight Edge: Position a straight edge between the two rails then confirm parallelism with a dial gauge. Using the straight edge as a reference to confirm subsidiary rail straightness from one end to the other, tightening the mounting bolts in sequence as you go.
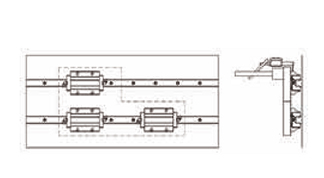
(2) Move the Table: Fasten two Linear Guide blocks on the master side to the table (or a temporary measurement table). Temporary fasten the subsidiary Linear Guide rail and block to the base and table. From the dial-gauge stand, with a dial gauge contact the subsidiary rail Linear Guide block side, move the table from the rail end and check the parallelism between the block and the subsidiary Linear Guide rail, fastening the bolts on sequences as you go.
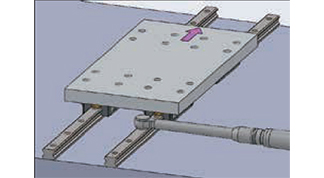
(3) Compare to the Master Linear Guide Rail: Make sure the master Linear Guide rail is properly installed.Temporarily fasten the subsidiary Linear Guide rail in place.Place a table on the Linear Guide blocks mounted on the master rail and on the temporarily fastened subsidiary Linear Guide rail. Fully tighten the mounting bolts on the two Linear Guide blocks on the subsidiary rail. With the remaining Linear Guide block on the subsidiary rail temporarily fastened, correct the position of the subsidiary Linear Guide rail, fully tightening its mounting bolts in sequence as you go.
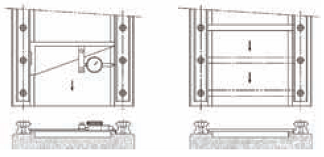
(4) Method Using a Jig: Using a jig as shown in confirm parallelism between the master-rail-side reference surface and that of the subsidiary rail at each mounting hole, and fully tighten the mounting bolt there.
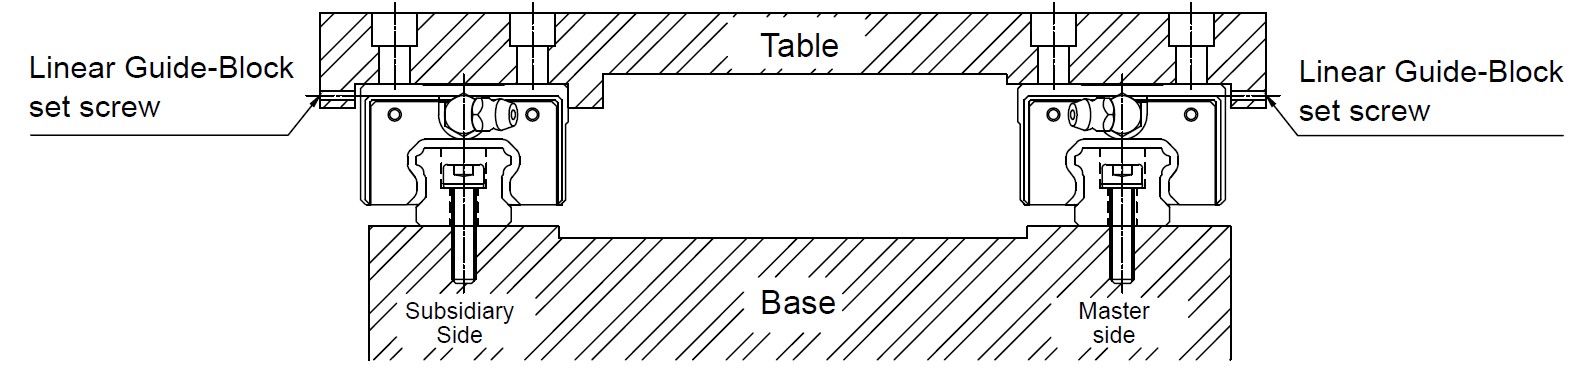
Sample Installation of the Linear Guide on a Vibration-and-Impact Susceptible Machine that Requires Rigidity and High Precision.
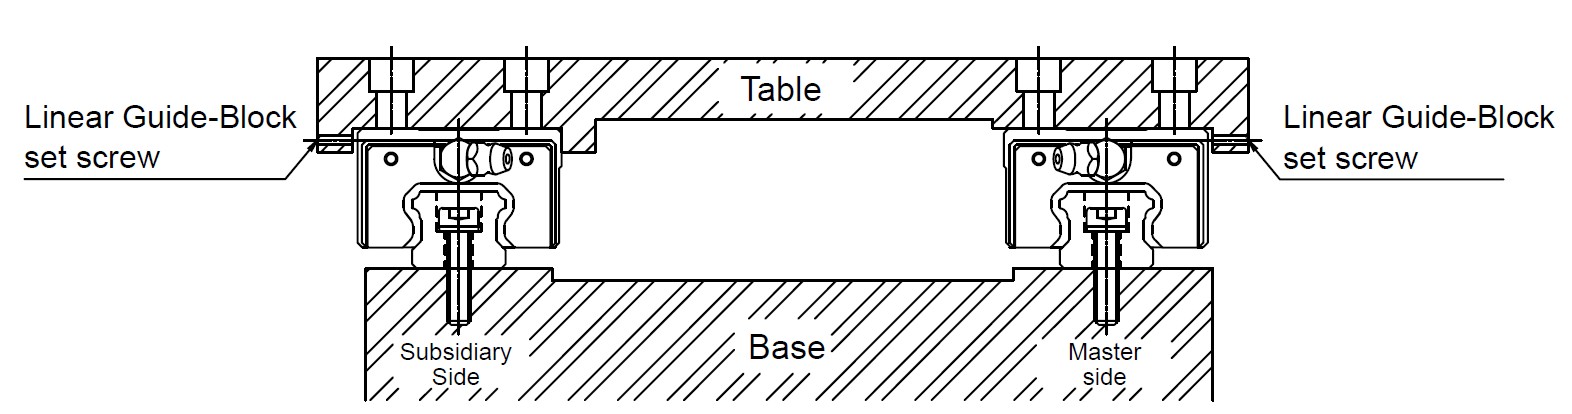
Sample Installation of the Linear Guide without a Reference Section for the Master Linear Guide Rail.
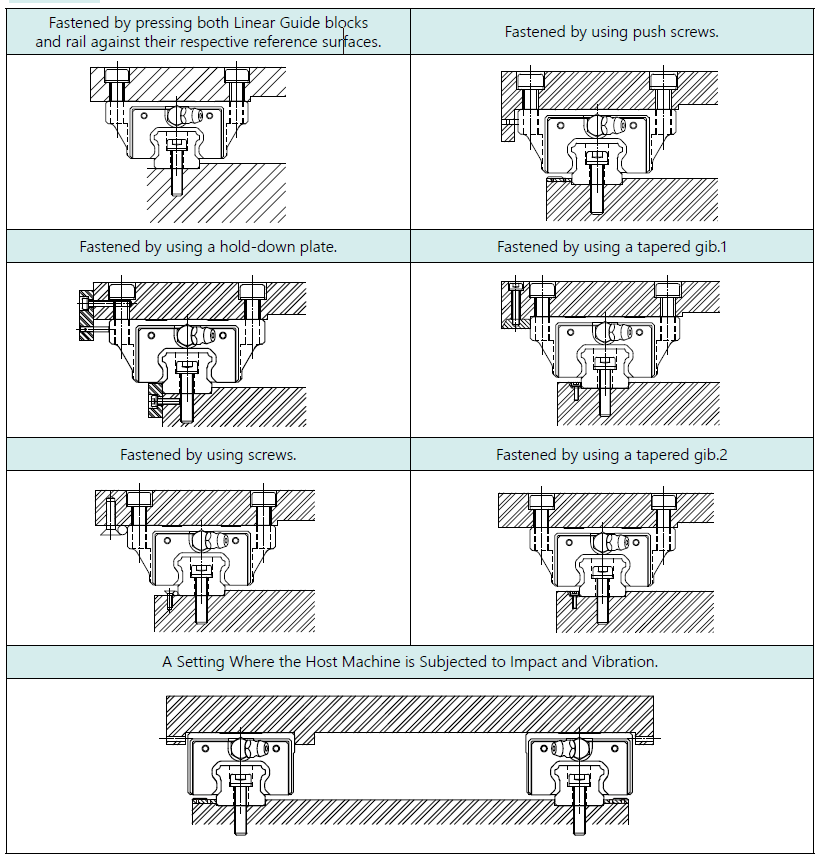
Common Fastening Method of Linear Guide
There are two main categories of installation precautions for linear guides::
1. Mounting the Linear Guide Rail
(A) Prior to assembly, always remove all burrs, dents and dust that are likely to form on the mounting surface of the machine on which Linear Guide is to be installed. 。
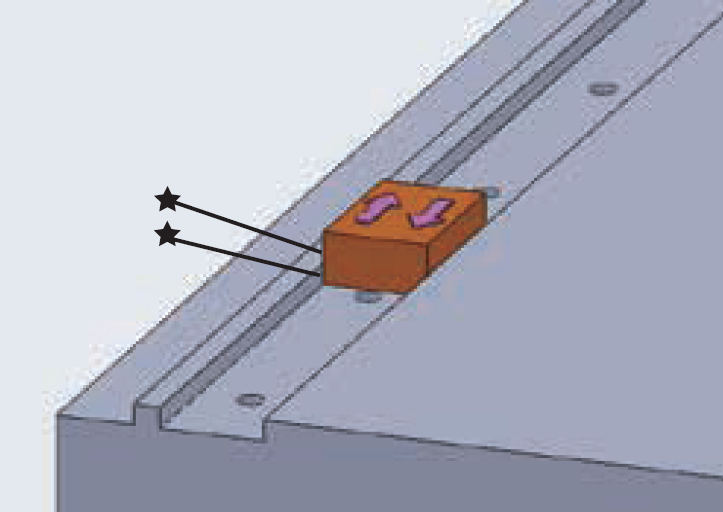
(B) Gently place a Linear Guide rail on the base, and temporarily tighten the bolts so that the rail lightly contacts the mounting surface. Hold the line marked side of the Linear Guide rail against matching the base-side reference surface
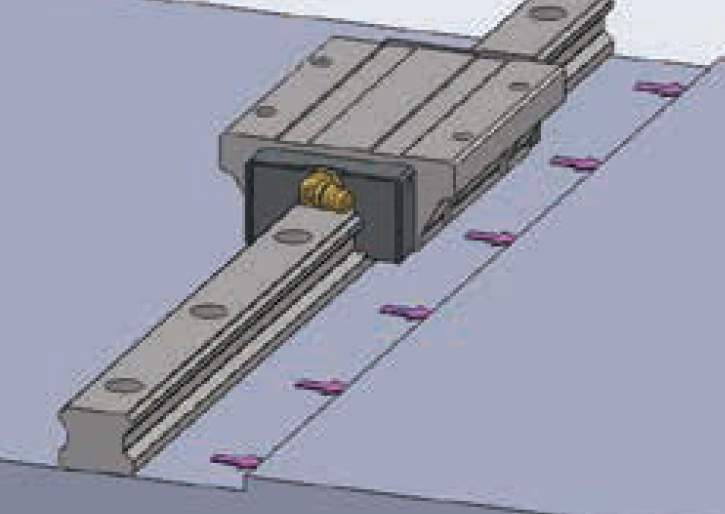
(C) Tighten the Linear Guide rail set screws in sequence, until they lightly contact the rail-mounting side surface.
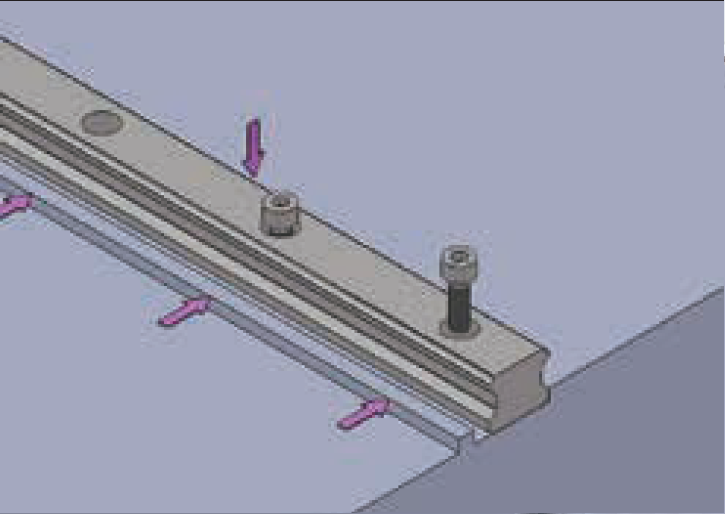
(D) Using a torque wrench, tightening the mounting bolts to the specific torque.
CAUTION : The sequence for tightening the Linear Guide rail mounting bolts should start from the center to the end. Following this sequence to maintain accuracy.
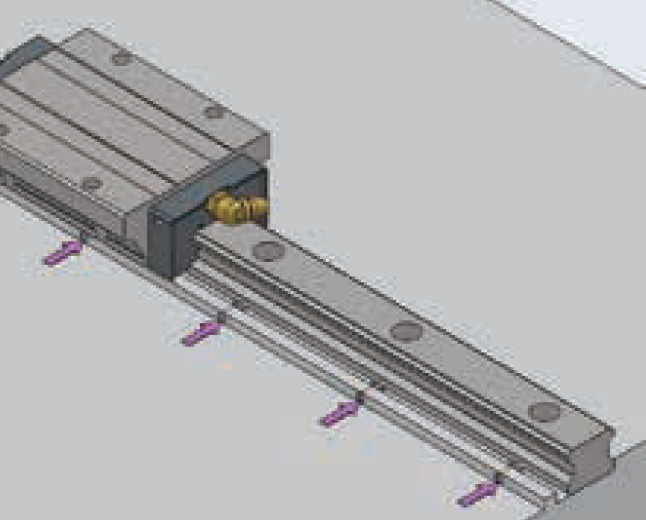
(E) Following the same procedures for the remaining Linear Guide rails, complete Linear Guide rail installation.
(F) Drive caps into the bolt holes on the Linear Guide rails so that they are flush with the rail top surface.
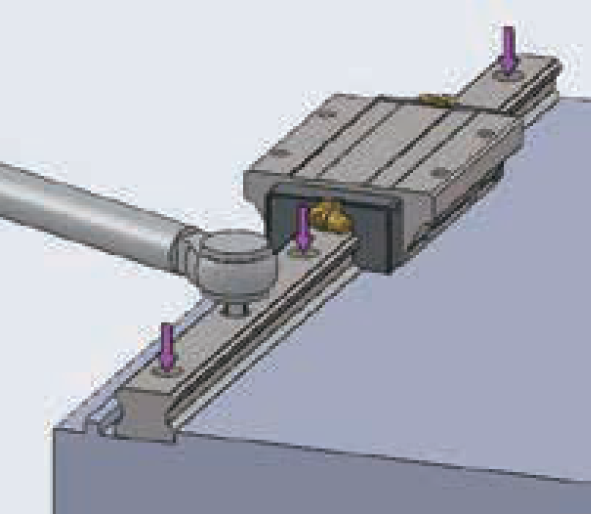
2. Mounting the Linear Guide Block
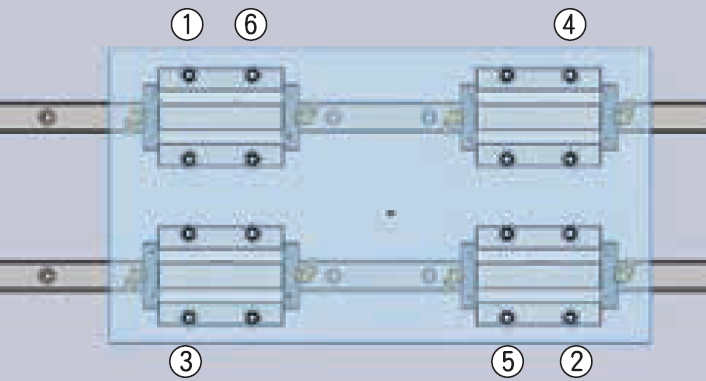
(A) Gently place a table on the Linear Guide blocks and temporarily tighten the mounting bolts.
(B) Using set screws, hold the master-rail Linear Guide block against the table reference-side surface, and position the table.
(C) Fully tighten the mounting bolts on both the master and subsidiary sides. This completes Linear Guide block installation.
CAUTION:To ensure uniform fastening of the table, tighten the mounting bolts diagonally, as shown in (See the illustration on the left for reference) in accordance with the numbers.
Linear Guide Basic Troubleshooting
| Item | Description of Defect | Possible Cause | Resulting Impact | Solution |
| Linear Rail | Raceway flaking / Surface spalling | Excessive load / End of service life / Machine crash | Rough motion | Product Replacement |
| Residual burrs on cut surface | Abnormal processing / Machining error | Damaged block accessories | Deburr / Replace accessories | |
| Rust / Pitting | Improper storage / Chemical corrosion | Poor appearance / Rough motion | Surface treatment / Product Replacement | |
| Eccentric load | Poor assembly precision / Misalignment | Rough motion / Abnormal wear / Reduced service life | Inspect installation accuracy / Reassemble |
| Item | Defect Description | Possible Cause | Consequence | Corrective Action |
| Linear Block | Raceway scratches | Excessive load / End of service life / Machine crash | Rough motion | Product Replacement |
| Damaged accessories | Machine crash / Collision | Functional failure | Replace accessories | |
| Rust / Pitting | Improper storage / Chemical corrosion | Poor appearance / Rough motion | Surface treatment / Product Replacement | |
| Foreign matter entry | Dirt / Cutting debris & dust | Recirculation system failure | Bellow for Linear Guide |